Introduction to Aroma Rice Cooker
Welcome to the world of Aroma rice cookers, where simplicity meets precision in the art of rice preparation. In this concise guide, we’ll navigate through the essential instructions for optimizing your Aroma rice cooker’s performance.
Understanding these steps is not just about making rice; it’s about ensuring a consistently delightful culinary experience. Let’s dive into the basics and unlock the full potential of your Aroma rice cooker for a hassle-free and flavorful cooking journey.

Unboxing the Rice Cooker
Upon unboxing your Aroma rice cooker, you’ll find a carefully curated set of components designed to simplify your cooking experience. Take inventory to ensure you have all the essentials:
- The main rice cooker unit
- Inner cooking pot
- Measuring cup
- Rice spatula
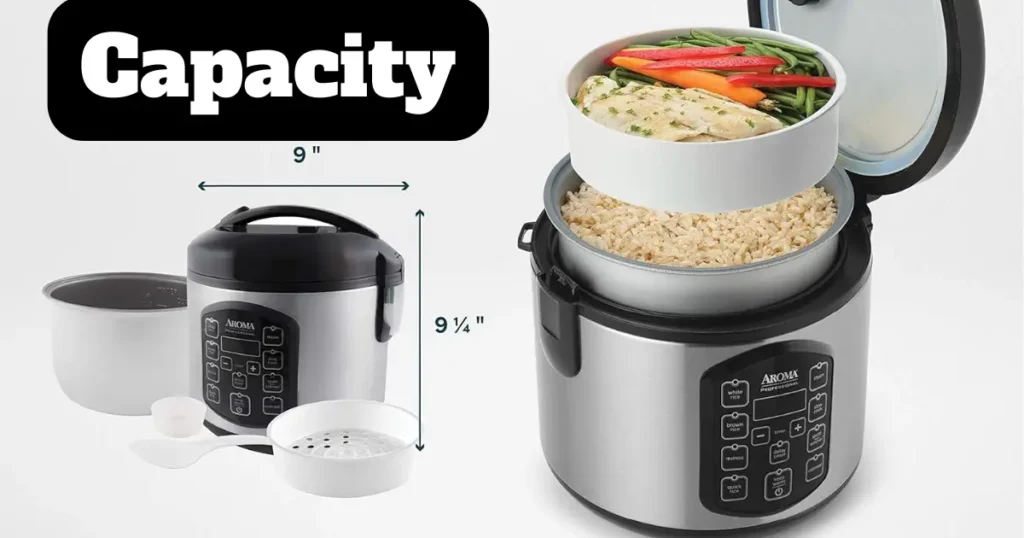
- Steam tray (if included)
- Condensation collector (if included)
Step-by-step Guide for Setting up the Rice Cooker
- Placing on a Flat Surface
- Find a stable, flat surface for your Aroma rice cooker. This ensures even cooking and stability during operation.
- Checking for Packaging Materials
- Before use, inspect the cooker for any remaining packaging materials. Remove labels, stickers, or protective films that may be present.
- Attaching Accessories (if any)
- If your Aroma rice cooker comes with additional accessories, such as a steam tray or condensation collector, attach them as per the user manual. This step is crucial for expanding the cooker’s functionality.
Following these initial setup steps ensures that your Aroma rice cooker is ready for action. Now that it’s in place, you’re on your way to effortlessly preparing delicious and perfectly cooked rice.
Control Panel Features
Overview of the Control Panel
The control panel of your Aroma rice cooker is the command center for precision cooking. Take a moment to familiarize yourself with its layout and features.
- Display: Most Aroma rice cookers come equipped with a digital display, providing clear information about the cooking process.
- Buttons: Identify the various buttons that allow you to control different aspects of the cooking cycle, including power, cooking modes, and additional functions.
Explanation of Buttons and Functions
- Power Button
- The power button serves as the on/off switch for your rice cooker. Press it to start the cooking process and again to turn the unit off when cooking is complete.
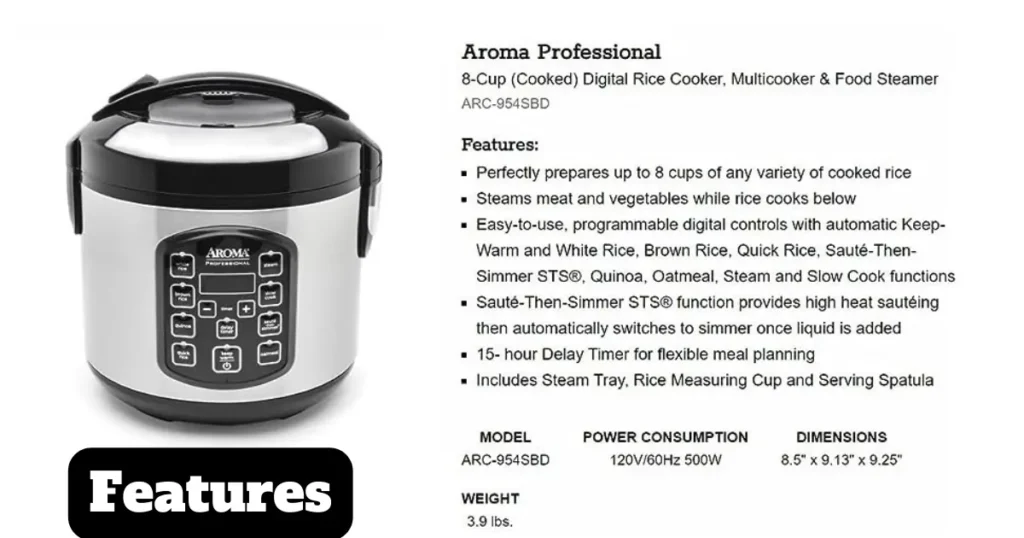
- Cooking Modes (e.g., White Rice, Brown Rice, Steam)
- Aroma rice cookers typically offer various cooking modes tailored to different types of rice and other grains. Select the appropriate mode based on your recipe to achieve optimal results.
- Timer and Delay Functions
- The timer and delay functions provide flexibility in meal preparation. Set a specific start time for the cooking cycle or use the timer to ensure your rice is ready precisely when you want it.
Understanding each button’s purpose and how it contributes to the cooking process empowers you to customize your cooking experience. Refer to the user manual for your specific model for a detailed guide on utilizing the control panel efficiently.
Measuring and Adding Ingredients
Importance of Using the Provided Measuring Cup
The provided measuring cup is not just a convenient accessory; it’s a key component for achieving perfectly cooked rice. Aroma rice cookers are calibrated to work optimally with the included cup, ensuring accurate water-to-rice ratios.
- Precision: The measuring cup is calibrated to provide precise measurements, crucial for achieving the right texture and consistency in your cooked rice.
- Consistency: By using the designated measuring cup consistently, you maintain a standard for your recipes, resulting in reliable and delicious rice every time.
Guidelines for Adding Rice and Water
- Measuring Rice: Use the provided cup to measure the desired amount of rice. Level off the top for accurate measurements.
- Water-to-Rice Ratio: Refer to the user manual for specific water-to-rice ratios. A common ratio is 1:2, meaning one cup of rice to two cups of water, but this can vary depending on the type of rice and personal preference.
- Avoid Overfilling: To prevent spillage and ensure even cooking, avoid overfilling the cooker. Follow the recommended maximum fill line.
Cooking Process
Step-by-Step Guide for Cooking Different Types of Rice
- White Rice
- Measure the desired amount of white rice using the provided cup.
- Rinse the rice under cold water to remove excess starch if needed.
- Add the measured rice and water to the cooker, following the recommended ratio.
- Select the “White Rice” mode on the control panel and press the start button.
- Brown Rice
- Measure brown rice, which typically requires a bit more water than white rice.
- Rinse the rice under cold water to remove any debris or excess starch.
- Add the measured brown rice and water to the cooker, following the recommended ratio.
- Select the “Brown Rice” mode on the control panel and press the start button.
- Other Grains or Recipes
- Consult the user manual for specific instructions on cooking different grains like quinoa, barley, or mixed rice recipes.
- Adjust the cooking mode and time according to the type of grain being prepared.
Understanding Indicator Lights and Signals During Cooking
- Cooking Indicator: The cooker’s display or indicator lights will typically show that the cooking process is in progress.
- Keep Warm Function: Once the rice is cooked, many Aroma rice cookers automatically switch to a “keep warm” mode. This is indicated on the control panel.
Adjusting Settings for Desired Results
- Fluffing: After the cooking cycle is complete, use the rice spatula to fluff the rice gently. This helps achieve a light and fluffy texture.
- Additional Cooking Time: If needed, you can add extra cooking time manually. Refer to the user manual for instructions on adjusting settings for extended cooking.
Understanding the nuances of cooking different types of rice and grains ensures that you can tailor your Aroma rice cooker to suit a variety of recipes.
Maintenance and Cleaning
Instructions for Cleaning the Inner Pot and Accessories
- Cool Down: Allow the rice cooker to cool down before cleaning to avoid burns or injuries.
- Removal of Inner Pot: Take out the inner cooking pot and wash it with mild detergent and warm water. Avoid using abrasive cleaners to prevent damage to the pot’s non-stick coating.
- Cleaning Accessories: If your Aroma rice cooker includes accessories such as a steam tray or condensation collector, remove and clean them separately according to the user manual.
Troubleshooting
Common Issues and Solutions
- Rice Sticking to the Bottom
- Possible Cause: Insufficient water or incorrect water-to-rice ratio.
- Solution: Adjust the ratio based on the type of rice being used. Adding a bit more water can prevent sticking.
- Overcooked or Undercooked Rice
- Possible Cause: Incorrect cooking mode or timer setting.
- Solution: Check the selected mode and cooking time. Adjust as needed for the desired doneness.
- Error Messages
- Possible Cause: Electrical issues, improper setup, or malfunction.
- Solution: Refer to the user manual for error code explanations. Ensure the cooker is set up correctly and contact customer support if necessary.
B. Rice Cooker Noises
- Normal Sounds: Aroma rice cookers may produce sounds like clicking or humming during operation. These are generally normal and indicate the heating element or thermostat working.
- Unusual Sounds: If you hear unusual noises, such as loud banging or popping, immediately turn off the rice cooker and contact customer support.
C. Unresponsive Control Panel
- Possible Cause: Electrical issues or control panel malfunction.
- Solution: Check the power source, ensure the cooker is correctly plugged in, and if the issue persists, contact customer support.
Troubleshooting ensures that your Aroma rice cooker consistently delivers excellent results. By addressing common issues promptly and understanding the normal sounds of the appliance, you can maintain the cooker’s functionality and enjoy hassle-free cooking experiences.
Conclusion
Recap of Key Points
In this comprehensive guide to Aroma rice cooker instructions, we’ve covered essential aspects to ensure you make the most of this versatile kitchen appliance. Let’s recap the key points:
- Unboxing and Setup: Properly set up your rice cooker, ensuring all components are in place for seamless operation.
- Control Panel Features: Familiarize yourself with the buttons and functions on the control panel to tailor your cooking experience.
- Measuring and Adding Ingredients: Use the provided measuring cup, follow recommended ratios, and explore optional additions for enhanced flavor.
- Cooking Process: Master the step-by-step guide for cooking various types of rice and grains, and understand indicator lights for optimal results.
- Maintenance and Cleaning: Keep your Aroma rice cooker in top condition by following guidelines for cleaning and storage.
- Troubleshooting: Address common issues promptly and seek assistance if needed for a trouble-free cooking experience.
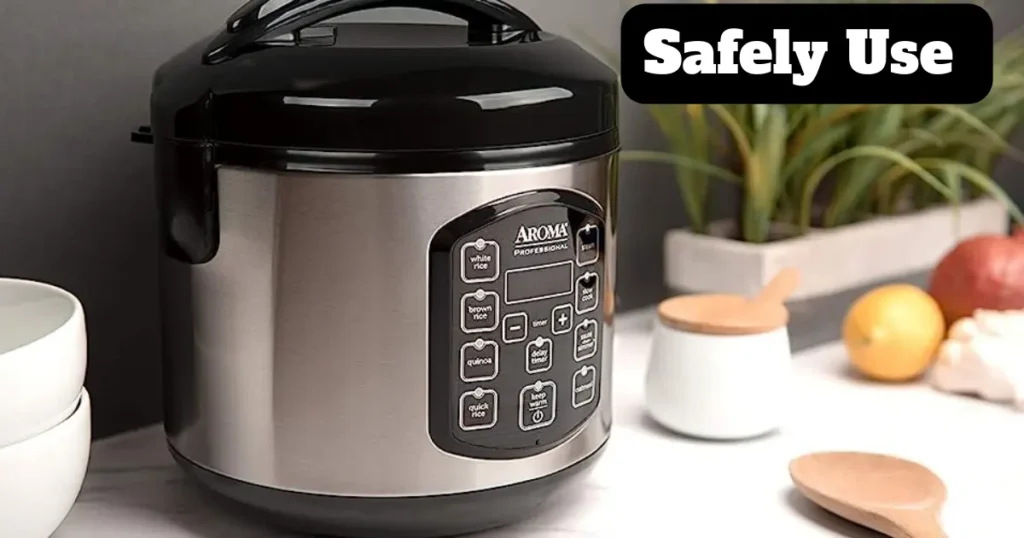
- Safety Precautions: Prioritize safety by reading the user manual, adhering to general safety tips, and following electrical safety precautions.
Frequently Asked Questions(FAQs)
The capacity of Aroma rice cookers varies by model. Typically, they come in sizes ranging from 3 to 20 cups of cooked rice. Refer to your specific model’s user manual for precise details on capacity.
: To clean your Aroma rice cooker, unplug it and allow it to cool. Remove the inner pot and accessories, then wash them with mild detergent and warm water.
Aroma rice cookers typically have indicator lights that show when the cooking cycle is complete. The cooker may also switch to a “keep warm” mode. Refer to the user manual for specific details related to your model.